
I’ve got a fun project for you today! And it starts with a basic unfinished wood box bought on clearance awhile ago. Unfinished wood boxes are plentiful at craft stores, and usually inexpensive. Just like paper maché boxes, starting a craft with a basic box provides unlimited options for creating something unique.
I love painting boxes, but recently I tried something new: I dyed the wood instead of painting it, and you can see my “how-to” over on my blog: How to Dye Unfinished Wood.
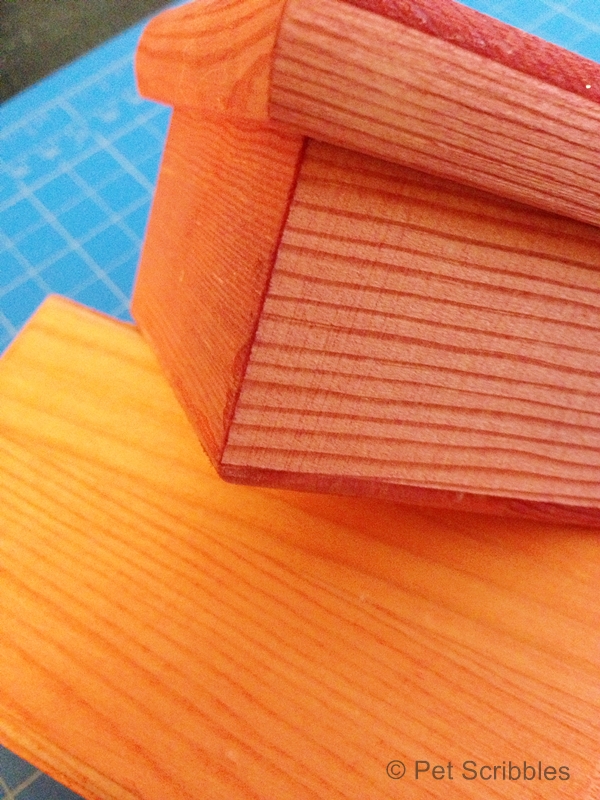
One of these dyed wood items – a small square box, dyed orange – is the basis for today’s craft:

Although I love the vibrant shade of orange, I decided to experiment a bit more using dye. I wondered what would happen if I added another color dye over the orange.
I love the color scheme of purple and orange, so why not see what some purple dye brushed onto the box might look like? And so that’s what I did!
I used Rit Dye in the liquid form, in Purple.
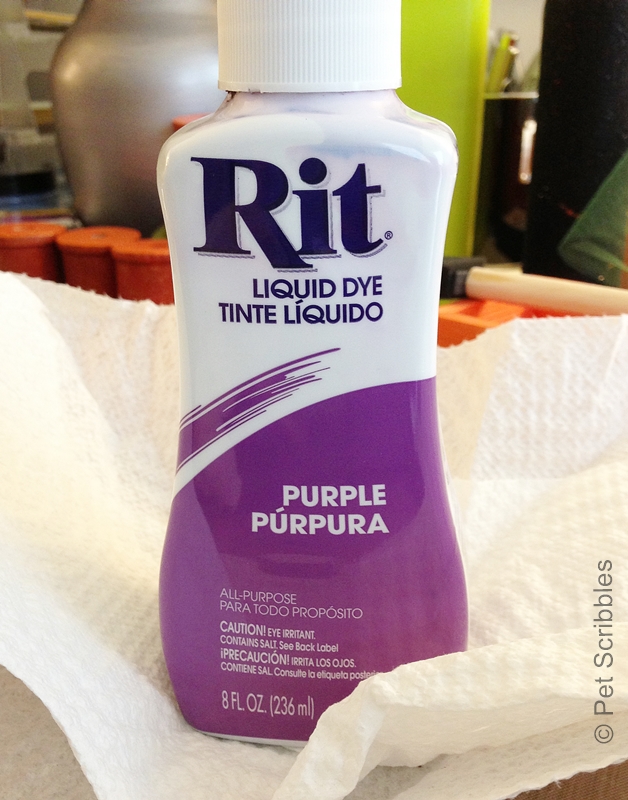
I poured a tiny amount into one of the way-too-many glass jars I have:

I added water and mixed it with a wooden dowel. Using a foam craft brush, I simply brushed this dye over the outside of both the orange box and the lid. The dye mix is very watery, of course, but it does absorb into the wood pretty fast so I was able to just wait a minute or two before turning the box over to do another section. Working with paper towels underneath the box helped capture any drips and drops while I worked.
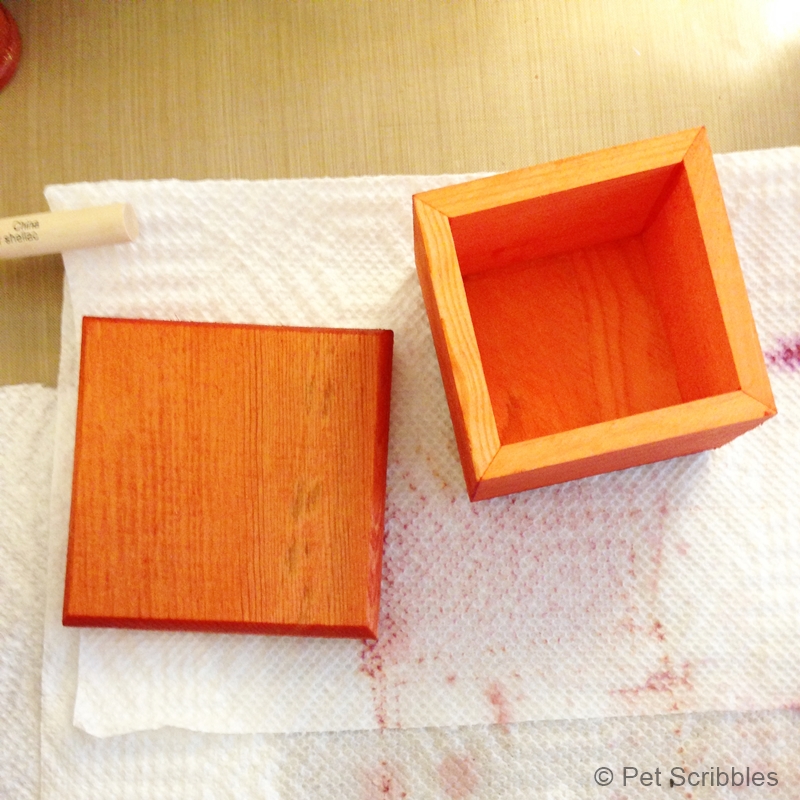
Here’s what the color looked like after one coat of the purple dye over the orange. The lid (on the left) has the purple dye on it, while the inside of the box (on the right) shows you the original orange color.
After brushing on a second coat, I let the box dry for 24 hours. You probably don’t have to wait that long, but I wanted to make sure the wood was totally dry. Once dry, I applied an acrylic sealer in a matte finish.
Here’s a comparison of two dyed boxes. The box on the left was dyed orange. The box on the right was dyed orange, and then dyed with two coats of purple dye brushed over the orange.
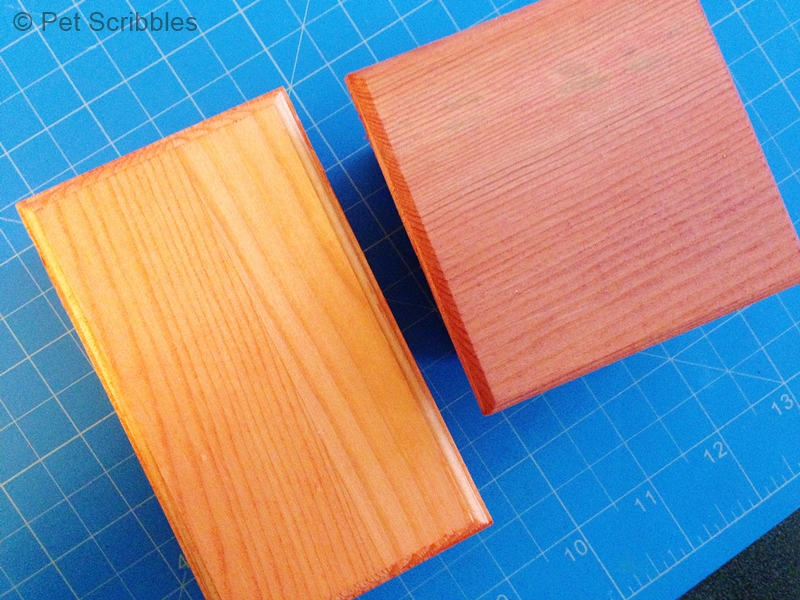
I really love the way the purple dye deepened and softened the vibrancy of the orange. After I did this experiment, I poked around on the Rit Dye website, and saw they suggested this technique (applying more than one shade of dye) as a way to give wood more of a weathered look.
I agree that the wood definitely looks more weathered, which of course I love! (Weathered, distressed, chipped, time worn, vintage-style: some of my favorite buzz words for the look and style I love in crafts and home decor.)
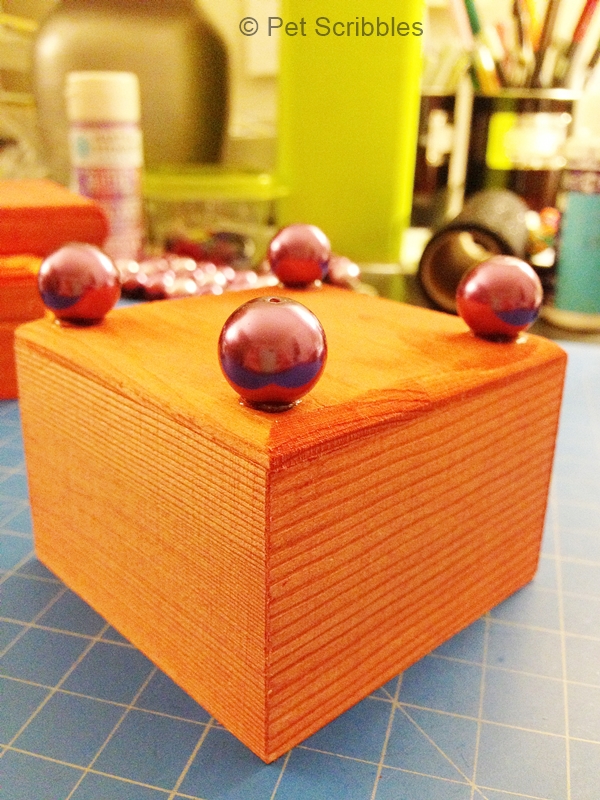
Now comes the fun part of this craft, because you can decorate and embellish these boxes any way your heart desires! Playing off the purple hues that were now part of the orange-ish box, I adhered four purple beads to the bottom of the box using E6000 adhesive. The beads came from an old bracelet that I had.
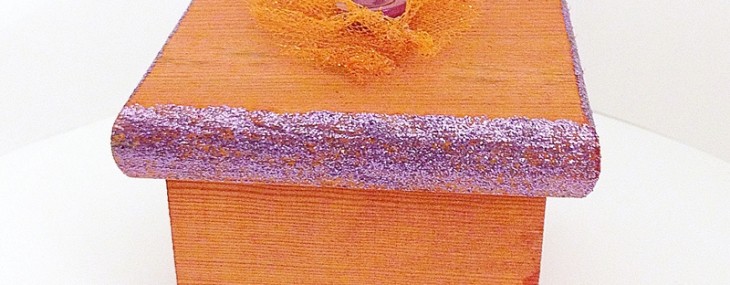
While I let the E6000 adhesive cure, I applied a similar purple shade of glitter paint around the sides of the box lid. Positioning the lid on top of a bottle allowed me to paint all four sides with ease.

I let both the box and the lid dry overnight. The next morning, I decided that not much more needed to be done to the box, as it was already so pretty.
I took some leftover scraps of orange glitter tulle, crumpled it up in my hand, then attached it with a large glue dot to the center top of the box lid. A matching purple button, attached with a small glue dot, was the finishing touch. (Bonus points if the orange glitter tulle looks familiar: I used it in both of my previous projects I’ve shared here on LCI! )
Here’s the box! Wouldn’t this be a cute gift for a special friend?

With the holidays coming up, I hope I’ve inspired you to take a fresh look at those unfinished wood boxes on the craft store shelves. A small box can be turned into something sweet and special. Just use your imagination, and maybe some of your old jewelry too!

Want to see some of my other craft tutorials? You can find more of them on my blog. I hope you’ll connect with me on Pinterest, Instagram, Facebook and Twitter. And I’ll be back here soon with another fun craft to share!
Happy crafting!
~Laura


Cute project! I have several wooden boxes that could use some sprucing up!
Thanks Jennifer! I’d love to see what you create – I bet the boxes will be gorgeous!
Laura / Pet Scribbles recently posted…How to Dye Unfinished Wood
That is adorable! Love the little feet on it 🙂
Dria recently posted…Operation Christmas Child
Thanks Dria! I think the little feet sort of elevated the box – no pun intended – to something sweet!
Laura / Pet Scribbles recently posted…How to Dye Unfinished Wood
Oh my heavens, what a happy little box!
Mary Beth @ Cupcakes and Crinoline recently posted…Simple Natural Ways to Add the Scent of the Holidays to Your Home
I love that description! Thanks Mary Beth! 🙂
Laura / Pet Scribbles recently posted…DIY Decorative Boxes: two ways
Is there anything better than glitter? I doubt it. Maybe chocolate 😉
Thanks for joining our Twirl and Take a Bow party! We would love to have you join us again…every Tuesday we go live!
Trina, I agree with you that chocolate is right up there at the top! Especially dark chocolate!
Laura / Pet Scribbles recently posted…How to grow your circles on Google+
Love this Laura! This is super cute!
Thanks very much Anne!
Laura / Pet Scribbles recently posted…How to grow your circles on Google+