Autumn is my favorite season, hands-down, and Halloween is a fun reason to decorate! Each year I like to make some new “old” decorations for our home. Last year I made a set of vintage-style potion and spell jars that are pretty in a Gothic sort of way. And this year I decided to make vintage-style Halloween boxes to feature some of my favorite vintage Halloween images that become like paper dolls on display. This is a craft that you can make and adapt to other seasons, not just Halloween, so I hope you’ll follow along and make some of your own!
Supplies: paper maché boxes, vintage images, 65-pound cardstock (one sheet), acrylic sealer, small decoupage scissors, Sparkle Mod Podge, brown marker, tulle (black and orange), glue dots (mini and large), craft wire, glitter paints in colors to match chosen images, seed beads, glitter spiders and other small vintage ephemera
Paint the boxes:
I used paper maché boxes that you can find at craft stores like Michaels. The first step is to paint the boxes. As there are so many ways you could paint these, I created a separate tutorial for this step which you can find here.
After the boxes were painted, I painted the edges with glitter paint in matching colors: dark orange glitter for one box and a brighter orange glitter for the other. The awesome thing about glitter paints is that you get the sparkle of glitter without the mess of glitter coming off in your hands once your project is dry.
Add decorative tulle to the lids:
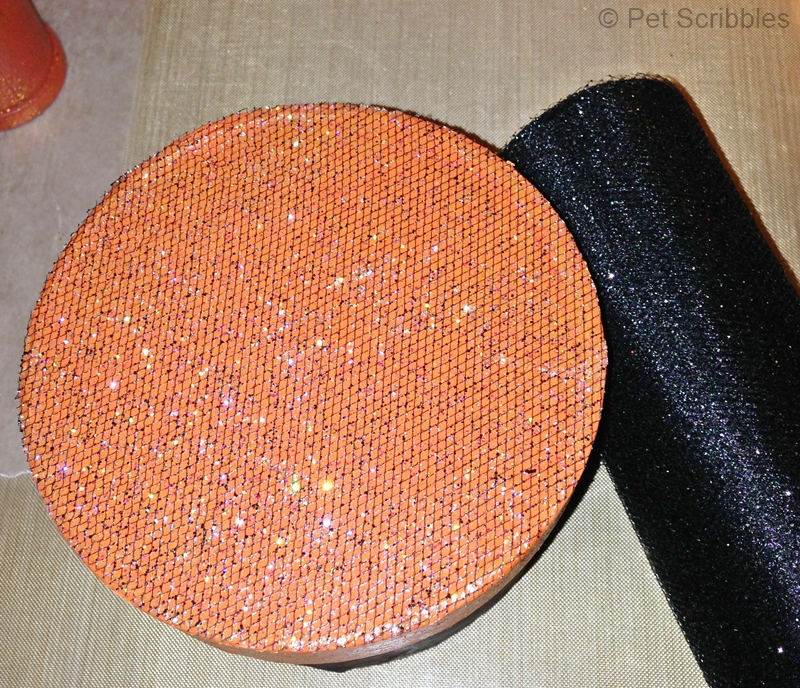
I picked up some decorative tulle from Michaels in orange and in black. This tulle had sparkles already in it, but I still used Sparkle Mod Podge (can you ever have too many sparkles?) to glue a piece of black to the top of each box lid. Let dry.

Once dry, I simply cut around the perimeter of the lid to trim off the excess.

Print and seal the vintage images:
Now it’s time to really play! I chose a few of my favorite vintage images – a sweet little girl dressed as a witch with her cat that I named Boo. Why I named him Boo I’m not sure, but like I said – I was playing, almost like playing with dolls all over again! The other image I chose was a black cat playing his fiddle. I printed these out on 65-pound cardstock and after letting them dry for a few minutes, printed another Halloween image of a Ouija board on the back of the cardstock. This way, when viewing the box from the back, the images have a finished look to them. I sprayed both sides with an acrylic matte sealer.
Cut out the images and outline:
Cut out the images using small decoupage scissors, which make it easy to cut into all those little details. Next, take a brown marker – I used a Sharpie – and run it along the edge of the images. This also provides a nice finish to each image. You can see in the image below the difference it makes:
Apply glitter to images:
Using a brush with a very small tip, apply glitter paints onto the images as desired. I painted red glitter on the girl’s hat and cape and white glitter on her dress. For the black cat I applied orange glitter to his hat, gold glitter to his fiddle, and black glitter to his face and body. Let dry.
Attach craft wire:
Take a piece of crafting wire and cut a length that will allow you to attach the image to one end, create a few spirals and attach the other end to the inside of the lid.
First, attach the wire to the inside of the box lid. After poking it through (using a craft knife to make a hole), simply twist it with your fingers or pliers into a circular shape. Take a small piece of paper ephemera, apply a few mini glue dots onto the back of it, and adhere it over the exposed wire as shown.
Attach tulle squares and seed beads:
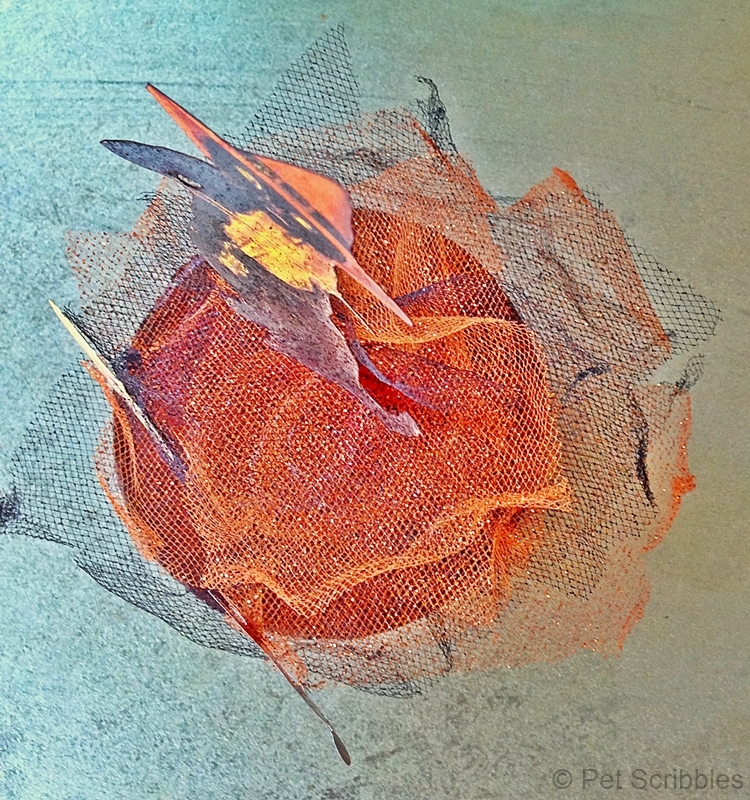
Cut out tulle squares (slightly larger than diameter of lid) and crinkle them up in your hand to wrinkle a bit. Thread onto the wire (poking the wire through the center of each square) and add a tiny seed bead in between each layer. Push these down the wire to the lid.
Take your wire and bend and twist it about two inches from the top. This will prevent the next tulle layers you’ll attach from moving all the way down the wire, and by doing so will create the illusion of many more layers than you’ll actually be attaching.
Cut out smaller tulle squares and thread onto the wire adding a seed bead in between each layer as before.
Attach wire to the vintage image:
Attach the other end of the wire to the lower back of the vintage image using large glue dots. Pull up the smaller tulle squares and press them to the glue dots. This does a few things: it sandwiches the wire between the image and the tulle, and it holds the tulle up to frame the lower part of the image.
Position the wire:
Using your hands, position the wire how you want it. I made mine into spirals and then pushed it down toward the lid so that all of the tulle layers appear to be continuous.
Final touches:
I cut out triangles in some of the edges of the tulle layers. I took some of these edges and rolled them back and forth in my fingers to finish the tulle and provide a bit more definition.
Fluff the tulle a bit until you’re happy with how it looks. Attach any further embellishments as desired. I attached some glitter spiders (left over from last year’s vintage potion jar project) as well as additional small ephemera pieces that I had in my stash.
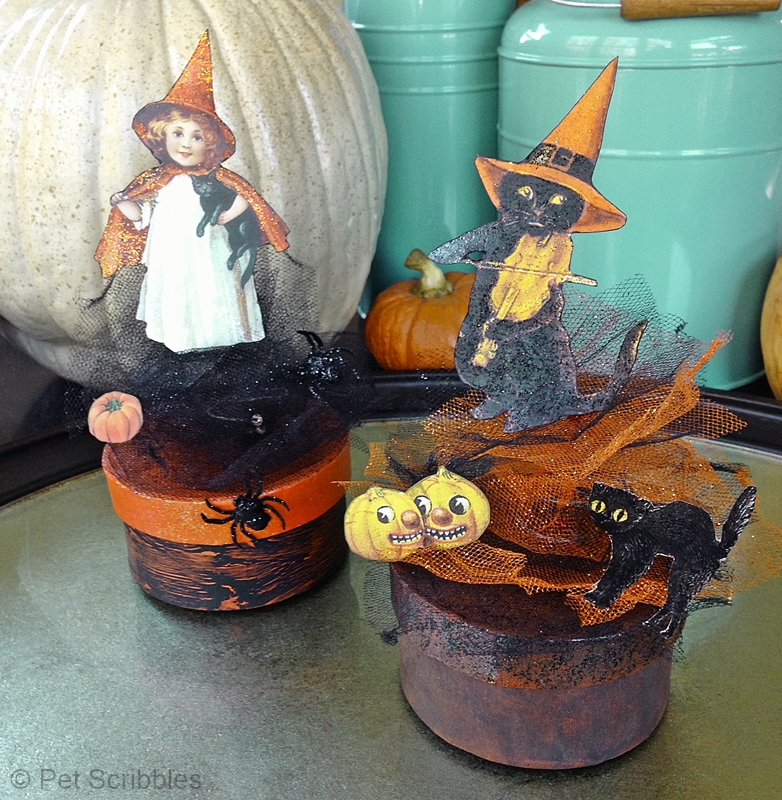
Vintage Black Cat Halloween Box:
Vintage Witch Girl Halloween Box:
There’s so many ways to personalize these boxes. You can choose images that will match your home decor or a particular seasonal vignette. You can make them completely your own with the embellishments you choose. The items I used were already in my craft supply stash, except for the decorative tulle and the paper maché boxes, so this project didn’t cost much at all. If you’ve got buttons, gems, pearls, flowers – any of these could be substituted for the embellishments I used on mine.
Vintage-Style Halloween Boxes:
I hope I’ve inspired you to take a fresh look at those unfinished paper maché boxes you see at the craft stores!
I’ll be back soon with another fun craft, but in the meantime you can visit me over at my blog. And get more fun ideas, projects and recipes on my Happy Halloween Ideas board on Pinterest! Follow me there!
Here’s wishing you a sparkle-filled Halloween!
~Laura


Oh my gosh, Laura! These are just adorable, and thanks to your excellent directions with accompanying photos, I think I could make something like this! Pinning and sharing!
Jane @ Cottage at the Crossroads recently posted…Fall Porch Tour 2013
Thanks Jane! I hope you do make something like this, because you are so darn creative! Let me know if you do! 🙂
Laura / Pet Scribbles recently posted…Make Your Own Vintage-Style Halloween Boxes
Great post Laura! They are awesome!
Thanks Jennifer! I can imagine some of these using your wonderful images of your dogs too, for a more modern take! 🙂 (hint, hint!)
Laura / Pet Scribbles recently posted…Make Your Own Vintage-Style Halloween Boxes
Adorable little boxes! They belong for sale in Home Goods! Love them Laura!
Wow, Susan! From your mouth to Home Goods’ ears! LOL Thank you!
Laura / Pet Scribbles recently posted…Make Your Own Vintage-Style Halloween Boxes
This is adorable I love the vintage witch so cute!!!
Dria recently posted…Operation Christmas Child
Thanks Dria! I love that she’s a sweet little girl witch, not spooky at all! 🙂
Laura / Pet Scribbles recently posted…Make Your Own Vintage-Style Halloween Boxes
This is a wonderful way to show off my vintage images! Thanks, Laura , I love your style!
Thanks so much Penny! The images do stand out (and up LOL), you’re right! 🙂
Laura / Pet Scribbles recently posted…Make Your Own Vintage-Style Halloween Boxes
These are positively adorable! Laura you are so talented and I’m loving how you captured a sweeter side of Halloween. Well done! 🙂
Vanessa
Vanessa recently posted…At the Picket Fence Parade of Homes ~ StoneGable
I really appreciate your words, Vanessaa! Here’s to a sweet Halloween!
Laura / Pet Scribbles recently posted…Make Your Own Vintage-Style Halloween Boxes
So cute!! Love the real vintage-y vibe so much!!
Shannon @ Fox Hollow Cottage recently posted…Pumpkin French Toast Sticks
Thank you Shannon! I had so much fun making these look vintage. I think the tulle is always a good material to help with this look!
Laura / Pet Scribbles recently posted…Make Your Own Vintage-Style Halloween Boxes
Fun project Laura. I pinned this post too, for fast reference to HOW to make those darling little boxes.
Thanks for sharing this MCatherine! And seeing your “PS” below – it sounds like you’ll be creating something adorable for your granddaughters! Let me know if you do – I’d love to see! 🙂
Laura / Pet Scribbles recently posted…Make Your Own Vintage-Style Halloween Boxes
PS My granddaughters will love to have one of these!
MCatherine recently posted…Red Glass Friendship Heart with 17th Century Irish Claddagh Symbol of Love Respect Loyalty 1.5×1.5x.5" 1.6oz by HideaHeart
Love these…this look is my favorite type of Halloween decoration. Thinking I could do this for Valentine’s Day, Easter, Christmas too. Great craft Laura!! Thanks for sharing.
Thanks so much Tammy! Mine too: I’ve had a penchant for vintage-style decorations ever since I was a little girl! 🙂
Laura / Pet Scribbles recently posted…Make Your Own Vintage-Style Halloween Boxes
Love these sweet vintage boxes! The tulle is my favorite part…makes them seem a bit ethereal!
Thank you Jenny! 🙂 And I’m so happy that you think the tulle makes them a bit ethereal, as that’s what I was aiming for! 🙂
Laura / Pet Scribbles recently posted…Make Your Own Vintage-Style Halloween Boxes
Oh my gosh, Laura. These boxes are just absolutely adorable. I love the ingenuity and creativity that went into making them.
Sharon recently posted…Setting Goals
Thanks so much Sharon! I really enjoy making them and am glad it shows!
Laura / Pet Scribbles recently posted…100 Days of Homemade Holiday Inspiration
Omigoodness, Laura … these are absolutely adorable!! I love vintage Halloween. This could be done for Christmas, too. Love it!!
Thanks Jennifer! Good idea about Christmas…. now you have me thinking! 😉
Laura / Pet Scribbles recently posted…100 Days of Homemade Holiday Inspiration
Laura these are too cute! I love vintage looking holiday decor! Great job!
Shanna Gilbert recently posted…My Was-Going-To-Be-A-Post-But-Now-Isn’t-A-Post Post
Thanks Shanna! I’m with you: vintage-looking holiday decor is so much fun!
Laura / Pet Scribbles recently posted…100 Days of Homemade Holiday Inspiration
Super cute vintage boxes!
katie recently posted…Punk Princess Onesie
Awwww, thanks Katie! 🙂
Laura / Pet Scribbles recently posted…100 Days of Homemade Holiday Inspiration
Very charming Laura! I think you could sell these lovelies!
malia recently posted…Project Inspire{d} #37: Halloween in Black, White and Orange
You’re so sweet, Malia! Thanks for such a nice compliment!
Laura / Pet Scribbles recently posted…100 Days of Homemade Holiday Inspiration
These are so neat! I’ve always loved vintage Halloween images.
Thanks for linking up to Twirl & Take a Bow! Hope to see you again this week!
~ Brooke ~
DesignedByBH recently posted…What Is Craftsy? (You’ll Want To Know!)
You’re welcome Brooke – you and the other gals host quite a fun link party! 🙂
Laura / Pet Scribbles recently posted…100 Days of Homemade Holiday Inspiration